IT Tools

Nodejs Https Server Example

In this article, we will explore how to create a secure HTTPS server using Node.js.

Update and Modifications

Update your Node.js HTTPS server to ensure it is running smoothly and securely. Make any necessary modifications based on the latest best practices and security recommendations.

If you are using an older version of Node.js, consider updating to the most recent release to take advantage of the latest features and improvements. Regularly check for updates to third-party dependencies and packages used in your server to prevent vulnerabilities.

When making modifications to your server configuration, be sure to test them thoroughly before deploying them in a production environment. This will help you identify and fix any potential issues or bugs that may arise.

Consider implementing Let’s Encrypt for automatic SSL certificate renewal, ensuring that your HTTPS server remains secure at all times. Additionally, make sure to configure your server to support the latest encryption algorithms and protocols for enhanced security.

Keep in mind that regular maintenance and updates are essential for keeping your Node.js HTTPS server secure and efficient. Stay informed about new developments in server security and apply them to your configuration as needed.

HTTPS Server Configuration

Step Description
1 Generate SSL certificate and key using OpenSSL
2 Include the ‘https’ module in your Node.js application
3 Create an options object with the SSL certificate and key
4 Create an HTTPS server using the ‘https.createServer’ method
5 Start the HTTPS server and listen on a specific port

Class: https.Agent Methods

The **https.Agent** class in Node.js provides methods for configuring HTTPS requests in a secure manner. By utilizing this class, developers can create secure connections using the HTTPS protocol in their applications.

One key method within the **https.Agent** class is the ability to set options for the HTTPS server, such as specifying the server name indication (**SNI**) and configuring Transport Layer Security (**TLS**) settings. These settings are crucial for ensuring secure communication over the network.

In a **Node.js** HTTPS server example, developers can utilize the **https.Agent** class to create a secure server that listens for incoming HTTPS requests. By implementing proper security measures, such as using a self-signed certificate or obtaining a certificate from **Let’s Encrypt**, developers can protect sensitive data transmitted over the network.

When setting up an HTTPS server with Node.js, it is important to understand concepts such as network sockets, hostnames, and encryption. By familiarizing oneself with these key concepts, developers can ensure that their HTTPS server is secure and reliable for handling client requests.

Class: https.Server Methods

To create an HTTPS server in Node.js, you can use the https module. The key methods for setting up an HTTPS server include **createServer()** and **listen()**.

First, generate a self-signed certificate using OpenSSL or a similar tool. Then, use the **createServer()** method to create the server instance with the appropriate options, including the SSL certificate and key.

Next, call the **listen()** method on the server instance to specify the port number and hostname. You can also set additional options such as time-out settings or server name indication.

Remember to handle any errors that may occur during the server setup process. You can use tools like Wireshark for debugging network socket communication.

Server Timeout and Close Operations

To handle server timeout, you can set a specific time limit for how long the server should wait for a response from the client. This helps prevent the server from waiting indefinitely for a request and allows it to free up resources for other tasks.

When it comes to close operations, you can gracefully close the server when it is no longer needed. This involves releasing all resources used by the server and terminating any ongoing connections.

By effectively managing server timeout and close operations in your Nodejs Https server, you can improve performance and ensure reliable communication with clients.

Creating HTTPS Server with Node.js

To create an HTTPS server with Node.js, you first need to generate a private key and a certificate. You can use tools like OpenSSL to create these files. Once you have your key and certificate ready, you can use them to create an HTTPS server in Node.js.

Here’s a simple example of how you can create an HTTPS server using Node.js:

“`javascript
const https = require(‘https’);
const fs = require(‘fs’);

const options = {
key: fs.readFileSync(‘privatekey.pem’),
cert: fs.readFileSync(‘certificate.pem’)
};

https.createServer(options, (req, res) => {
res.writeHead(200);
res.end(‘Hello World!’);
}).listen(443);
“`

In this example, we’re using the `https` module in Node.js to create a server that listens on port 443. We pass in the options object with our private key and certificate file paths to create a secure connection.

Remember to replace ‘privatekey.pem’ and ‘certificate.pem’ with the actual file paths of your key and certificate.

This is a basic example of creating an HTTPS server with Node.js. You can further customize your server by adding **middleware** or **handling different routes** based on the incoming requests.

Creating an HTTPS server with Node.js allows you to secure the communication between clients and your server by using Transport Layer Security. It’s essential for protecting sensitive information and ensuring the integrity of your data.

Kubectl Login Command Guide

Welcome to our comprehensive guide on using the kubectl login command effectively. In this article, we will walk you through the steps to authenticate and access Kubernetes clusters with ease. Let’s dive in!

Authentication Options for kubectl

To authenticate with **kubectl**, there are several options available. One common method is using a **configuration file** that contains credentials for accessing the cluster. This file typically includes information such as the server URL, user credentials, and **authentication** method.

Another option is to use **environment variables** to provide authentication details. This can be useful for automating processes or integrating **kubectl** into scripts.

If you prefer a more interactive approach, you can use the **kubectl login** command to enter your credentials directly. This method is similar to logging into a website with a username and password.

For more advanced scenarios, you can explore **role-based access control** (RBAC) to define fine-grained permissions for users and groups. RBAC allows you to control who can access what resources within the cluster.

Working with kubectl Commands

When working with **kubectl** commands, the **kubectl login** command is essential for securely accessing your Kubernetes clusters. This command allows you to authenticate yourself and establish a secure connection to the cluster.

To use the **kubectl login** command, you will need to have the necessary credentials and permissions configured, such as access tokens or certificates. Once authenticated, you can start interacting with the cluster using various **kubectl** commands to manage resources, deploy applications, and troubleshoot issues.

Remember to follow best practices for security, such as using **Transport Layer Security** (TLS) to encrypt communication and implementing **Role-based access control** (RBAC) to control user permissions. Additionally, consider using tools like **OAuth** for single sign-on and **OpenID** for identity management in your Kubernetes environment.

By mastering the **kubectl login** command and understanding the importance of secure authentication, you can effectively manage your Kubernetes clusters and streamline your workflow.

Setting up kubectl on Various Nodes

Terminal window with kubectl command

Setting up **kubectl** on various nodes involves running the **kubectl login** command on each node to authenticate and gain access to Kubernetes clusters.

To start, ensure that you have the necessary permissions and credentials to access the clusters. Next, use the **kubectl config** command to set up the necessary configuration files on each node.

You may need to specify the server address, authentication method, and other details in the configuration file. Once the configuration is set up, you can use the **kubectl get nodes** command to verify that you can access and manage the nodes successfully.

Remember to follow best practices for security, such as using **Transport Layer Security** and setting up access controls to protect your clusters from unauthorized access.

By setting up **kubectl** on various nodes properly, you can streamline your workflow and efficiently manage your Kubernetes clusters across different environments.

Learn Linux Kernel Programming

Uncover the inner workings of the Linux operating system through the art of kernel programming.

Getting Started

To get started with **Linux Kernel Programming**, you will need to have a basic understanding of the **Linux kernel** and some experience with **computer programming**. Familiarize yourself with the **GNU General Public License** as it pertains to Linux, as well as the **C standard library** which is commonly used in kernel programming.

Explore the **source code** of the Linux kernel to understand its structure and components. Git is commonly used for version control in Linux kernel development, so it’s essential to learn how to use it effectively. Familiarize yourself with the **GNU Compiler Collection** (GCC) as it is often used to compile Linux kernel code.

Documentation is crucial in Linux kernel programming, so make sure to read through the **man pages** and any **README** files provided. Join mailing lists and forums related to Linux kernel development to stay updated and seek help when needed.

Understanding the difference between **user space and kernel space** in Linux is important as you delve into kernel programming. Keep in mind the **programming style** guidelines followed by the Linux kernel community to ensure your code is consistent with the rest of the kernel.

Consider taking training courses offered by organizations like the **Linux Foundation** to deepen your knowledge and skills in Linux kernel programming. Practice writing simple kernel modules and experimenting with different functionalities to gain hands-on experience.

Kernel Modules

Name Description
Module 1 This module provides support for XYZ functionality in the Linux kernel.
Module 2 Module 2 adds additional networking capabilities to the kernel.
Module 3 This module enhances the performance of the file system in Linux.

Device Drivers

Device drivers in Linux are typically written in C programming language and follow specific conventions to integrate seamlessly with the kernel. It is important to be familiar with the GNU General Public License and adhere to the programming style guidelines to contribute code effectively.

Linux device drivers interact with hardware by implementing functions that handle device operations, such as reading from or writing to a device. These drivers are loaded into the kernel and run in kernel space, allowing direct access to hardware resources.

When developing device drivers for Linux, it is essential to refer to the source code and documentation provided by the Linux Foundation. Understanding the Linux Kernel’s architecture and APIs is crucial for creating efficient and reliable device drivers.

Testing and debugging device drivers is an integral part of the development process. Utilizing tools like Git for version control and the GNU Compiler Collection for compiling code can help streamline the development workflow.

In addition to writing device drivers, maintaining proper documentation and contributing back to the Linux community is encouraged. Engaging with mailing lists and software repositories can provide valuable feedback and support for your driver development efforts.

Advanced Concepts

You will also learn about kernel modules and how to write your own, allowing you to extend the functionality of the kernel without having to recompile the entire source code.

Additionally, you will explore system calls and their role in allowing user space applications to interact with the kernel. Understanding how to use and implement system calls is crucial for kernel programming.

Moreover, advanced concepts cover topics such as interrupt handling and memory management within the kernel. These are essential components of kernel programming that require a deep understanding of computer architecture and operating system principles.

By mastering these advanced concepts, you will be equipped to work on complex kernel development projects and contribute to the Linux community. The knowledge gained from this advanced training will set you apart as a skilled Linux kernel programmer.

Build Embedded Linux Systems

Are you ready to dive into the world of building custom embedded Linux systems? This article will guide you through the process, from selecting hardware to configuring the software, so you can create your own specialized devices.

Microcontroller vs Microprocessor Differences

When building embedded Linux systems, it’s important to understand the differences between a microcontroller and a microprocessor.

Microcontrollers are typically used in embedded systems, featuring integrated memory, peripherals, and a CPU on a single chip. Microprocessors, on the other hand, are more powerful processors used in general-purpose computing devices.

Microcontrollers are often used in applications such as consumer electronics, IoT devices, and industrial automation, while microprocessors are found in computers, servers, and data centers.

Understanding the differences between these two types of processors is crucial when designing and developing embedded Linux systems.

When working with Linux on embedded systems, it’s important to choose the right processor based on the requirements of the project.

Microcontrollers are typically used in applications where cost, power consumption, and size are critical factors, while microprocessors are used in applications that require more processing power and advanced features.

Why Use Linux in Embedded Systems?

Using **Linux** in **embedded systems** offers a wide range of benefits that make it an attractive choice for developers.

**Linux** provides a **flexible and customizable** platform that can be tailored to meet the specific requirements of embedded systems. This allows developers to create **highly optimized** systems that are perfectly suited for their intended use.

Additionally, **Linux** is an **open-source** operating system, which means that developers have access to the **source code** and can modify it to suit their needs. This level of **customization** is particularly important in embedded systems, where every component must be carefully optimized for performance and efficiency.

Furthermore, **Linux** has a **large and active community** of developers who are constantly working to improve the operating system and add new features. This means that developers can rely on a **wealth of resources** and **support** when building embedded systems with **Linux**.

Networking & Interoperability

One key aspect of networking in embedded systems is the ability to connect to the internet, enabling devices to access remote resources and services. Whether it’s for firmware updates, data retrieval, or remote monitoring, having a reliable network connection is paramount. **Ubuntu** is a popular Linux distribution known for its robust networking capabilities, making it a suitable choice for embedded systems development.

In terms of interoperability, it is crucial to ensure that **device drivers** are compatible with the hardware being used. This involves understanding the underlying processor design, such as **ARM Cortex-M** or **ARM9**, and how it interacts with the kernel and other system components. By leveraging open source libraries and source code, developers can create custom drivers that seamlessly integrate with the Linux operating system.

Additionally, deploying embedded Linux systems requires careful consideration of memory management, file systems, and booting mechanisms. Understanding how these components interact with the hardware is essential for ensuring optimal performance and reliability. By utilizing tools like the **RPM Package Manager** and **Docker**, developers can streamline the deployment process and automate software updates.

Security Considerations

When building embedded Linux systems, it is crucial to consider security measures to protect your device and data. One important aspect to focus on is securing the bootloader and kernel to prevent unauthorized access or modifications. Utilizing secure boot mechanisms and signing images can help ensure the integrity of your system.

Another key consideration is implementing proper access control measures to restrict privileges and permissions for users and applications. This includes setting up **firewalls** and utilizing **encryption** to safeguard communication channels and data storage.

Regularly updating your system with the latest security patches and fixes is essential to address any vulnerabilities that may arise. It is also recommended to disable unnecessary services and features to reduce the attack surface of your device.

When developing embedded Linux systems, it is important to follow best practices for secure coding and software design. This includes **sanitizing input**, validating user inputs, and implementing secure communication protocols.

Furthermore, incorporating security features such as secure bootloaders, **memory protection units (MPUs)**, and **hardware encryption** can enhance the overall security of your embedded Linux system.

By prioritizing security considerations during the development and deployment of embedded Linux systems, you can help mitigate potential risks and ensure the integrity and confidentiality of your device and data.

Filesystems & Databases

When building embedded Linux systems, understanding filesystems and databases is crucial. Filesystems are responsible for organizing and storing data on the device, while databases manage the structured data within the system.

A common choice for filesystems in embedded Linux systems is ext4, known for its reliability and performance. Databases like SQLite are often used due to their lightweight nature and compatibility with embedded systems.

It’s important to consider the requirements of your specific project when choosing a filesystem and database. Factors such as data access speed, storage capacity, and system resources should all be taken into account.

Properly configuring and optimizing your filesystem and database can greatly impact the overall performance and efficiency of your embedded Linux system. Regular maintenance and monitoring are also essential to ensure smooth operation over time.

By familiarizing yourself with different filesystems and databases, you can make informed decisions when designing and implementing embedded Linux systems. This knowledge will help you create reliable and efficient systems tailored to your specific needs.

Multiple Processes Management

When working with embedded Linux systems, managing multiple processes efficiently is crucial. This involves overseeing various tasks simultaneously to ensure the system functions smoothly and effectively. Process management is a fundamental aspect of embedded Linux development, as it allows for optimal resource allocation and utilization.

One key consideration in multiple processes management is ensuring that each process has the necessary resources to operate effectively. This includes managing memory allocation, processor usage, and other system resources to prevent bottlenecks and ensure a seamless operation. Properly managing processes also involves handling dependencies between different tasks, as well as prioritizing critical processes to maintain system stability.

In embedded Linux systems, the kernel plays a crucial role in managing processes. The kernel is responsible for coordinating the execution of various tasks, handling system calls, and providing a secure environment for processes to run. Understanding how the kernel interacts with processes is essential for efficient process management in embedded systems.

Additionally, developers working on embedded Linux systems should be familiar with tools such as Yocto Project and OpenEmbedded for building custom Linux distributions tailored to specific hardware requirements. These tools provide comprehensive solutions for managing processes, configuring system components, and optimizing system performance in embedded applications.

By mastering the principles of multiple processes management in embedded Linux systems, developers can create robust and reliable systems for a wide range of applications, from consumer electronics to industrial automation. With the right knowledge and tools at their disposal, developers can harness the power of Linux to build cutting-edge embedded systems that meet the demands of today’s interconnected world.

Language and Library Support

Bookshelf with various language books

Utilizing the RPM Package Manager can help manage software packages efficiently on your embedded system. Consider using Ubuntu as your base distribution for its user-friendly interface and wide community support.

Understanding processor design, such as the ARM Cortex-M or ARM architecture family, is essential for optimizing performance on your embedded system. Ensure that your system has the necessary memory management unit for efficient memory usage.

Booting your embedded Linux system correctly is key to its functionality. Familiarize yourself with the kernel and device drivers to ensure smooth operation. Utilize virtual environments like VirtualBox for testing and development.

Consider the deployment environment of your embedded system, whether it be in a data center, IoT device, or computer appliance. Pay attention to software bugs and runtime systems for a seamless user experience.

Incorporating open source tools and modular programming techniques can streamline development and maintenance of your embedded Linux system. Stay informed about the latest advancements in embedded Linux, such as real-time computing and multi-core processors.

By mastering language and library support for embedded Linux systems, you can create efficient and reliable devices for a variety of applications. Keep learning and exploring new technologies to stay ahead in the ever-evolving field of embedded computing.

Hardware Isolation from Software

One way to achieve hardware isolation is by utilizing **device drivers**. These drivers act as a bridge between the hardware and the operating system, allowing the software to communicate with the hardware in a standardized manner. By isolating the hardware in this way, developers can write software that interacts with the hardware without needing to understand the intricacies of the underlying components.

Another important aspect of hardware isolation is **memory management**. By partitioning the memory of a system and allocating specific regions for different tasks, developers can prevent software from accessing areas of memory that it shouldn’t. This helps to ensure the stability and security of the system while maintaining optimal performance.

Developer Availability and Cost Factors

Developer coding on a computer

Developer Availability and Cost Factors are crucial considerations when building embedded Linux systems.

Having skilled developers who are knowledgeable in Yocto Project and OpenEmbedded is essential for successful project execution. Developers should have experience in kernel customization, library integration, and memory management unit optimization.

The availability of developers with expertise in ARM architecture family and AVR microcontrollers can impact project timelines and costs significantly.

Consider the cost implications of hiring developers with experience in device driver development, runtime system configuration, and deployment environment setup.

Having a clear understanding of the deployment environment, file system requirements, and function of the system will help in estimating developer availability and cost factors accurately.

Ensure that developers are proficient in modular programming and have the necessary skills to troubleshoot software bugs efficiently.

By considering these factors, you can build embedded Linux systems effectively and efficiently, ultimately saving time and resources in the long run.

Design Workflow for Embedded Systems

When designing a workflow for embedded systems, it is important to first consider the specific requirements of the project. This includes determining the hardware components needed, the software architecture, and any other tools necessary for development.

Embedded Linux systems are popular due to their flexibility and open-source nature. They can be customized to meet the needs of a wide range of applications, from small devices to large-scale systems.

One key aspect of designing a workflow for embedded systems is selecting the appropriate kernel for the project. The kernel serves as the core of the operating system, managing hardware resources and providing essential functions for the system to run smoothly.

Next, developers need to consider the file system for the embedded system. The file system organizes and stores data on the device, ensuring that information is accessible and secure. Choosing the right file system is crucial for the overall performance and reliability of the system.

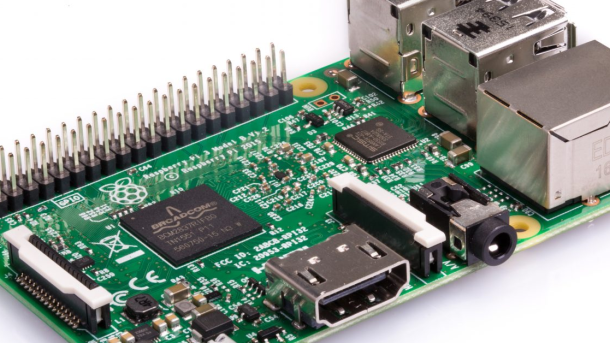
Raspberry Pi Considerations

When considering using a Raspberry Pi for your embedded Linux system, it’s important to think about the specific requirements of your project. Make sure to choose the right model of Raspberry Pi for the job, considering factors such as processing power, memory, and connectivity options.

Compatibility with any additional hardware or peripherals you plan to use is key. Ensure that the Raspberry Pi you select can support everything you need it to, whether that’s sensors, cameras, or other devices.

Keep in mind that power consumption may be a factor, especially if your embedded system will be running on battery power. Some Raspberry Pi models are more power-efficient than others, so choose accordingly to maximize the battery life of your device.

Consider the size and form factor of the Raspberry Pi, as well as any additional components you plan to add. Make sure that everything will fit together neatly and that the overall design is practical for your project’s needs.

If you’re new to working with Raspberry Pi or embedded Linux systems, consider taking a Linux training course to familiarize yourself with the basics. This will help you understand how to set up and configure your system effectively, as well as troubleshoot any issues that may arise.

Peripherals in Embedded Systems

Peripherals play a crucial role in embedded systems, providing the means to interact with the outside world. These components can include sensors, actuators, displays, and more, allowing the embedded system to sense and respond to its environment.

When building embedded Linux systems, it’s essential to understand how to interface with these peripherals effectively. This involves writing and configuring device drivers to communicate with the hardware, as well as utilizing the appropriate APIs or libraries to access the peripherals from the application software.

One common example of a peripheral in embedded systems is the General-Purpose Input/Output (GPIO), which allows for simple digital communication with external devices. Understanding how to configure and utilize GPIO pins is essential for many embedded projects.

In addition to GPIO, other peripherals such as I2C and SPI interfaces are commonly used in embedded systems to communicate with devices like sensors and displays. These interfaces require specific configurations and protocols to function correctly, which must be considered when designing the embedded system.

BGA Packages for Hardware Design

When designing hardware for embedded systems, BGA packages play a crucial role. **BGA packages** are often used for **ARM9** and **AVR microcontrollers**, providing a compact and efficient solution for your hardware design needs.

These packages offer a high pin count in a small form factor, making them ideal for space-constrained applications. When working with BGA packages, it is essential to pay attention to the layout and routing of your PCB to ensure signal integrity and reliability.

Integrating BGA packages into your hardware design requires a good understanding of the **kernel**, **device drivers**, and **application software** needed for your embedded Linux system. By learning how to work with these components, you can create a stable and efficient system for your project.

Taking Linux training courses can help you gain the knowledge and skills necessary to work with BGA packages and build embedded Linux systems effectively. With the right training, you can confidently tackle the challenges of designing hardware for the **Internet of Things** and other embedded applications.

By mastering the intricacies of BGA packages and Linux systems, you can unlock the full potential of your hardware design projects. Invest in your education and training to develop the expertise needed to succeed in the fast-paced world of embedded systems.

Non-Volatile Storage Options

A USB flash drive.

Another common non-volatile storage option for embedded Linux systems is SD cards, which are cost-effective and widely available. SD cards are easy to interface with and can store large amounts of data, making them ideal for applications that require high storage capacity.

When choosing a non-volatile storage option for your embedded Linux system, consider factors such as storage capacity, speed, and durability. It’s also important to ensure compatibility with your hardware and operating system to avoid any compatibility issues.

In addition to flash memory and SD cards, other non-volatile storage options for embedded Linux systems include NAND flash and EEPROM. NAND flash is commonly used in consumer electronics due to its high storage capacity, while EEPROM offers low power consumption and a high level of data retention.

Booting Embedded Linux Systems

Booting Embedded Linux systems can be a complex process, but with the right guidance, it can be easily achieved. One of the first steps in booting an embedded Linux system is to ensure that the bootloader is properly configured. This is essential for loading the Linux kernel and initializing the system.

Next, it is important to set up the kernel parameters correctly to ensure that the system boots smoothly. This includes specifying the root filesystem, the console device, and any other necessary settings for the system to function properly. Additionally, configuring the kernel to support the specific hardware components of the embedded system is crucial for successful booting.

Once the bootloader and kernel parameters are set up, the Linux kernel can be loaded and executed on the embedded system. This process involves loading the kernel image into memory and initializing the system, including setting up the memory management unit, initializing the CPU, and configuring the system devices.

After the kernel is successfully loaded, the root filesystem can be mounted, and the system can be brought up to a fully functional state. This may involve starting essential system services, initializing hardware devices, and launching user applications.

Console UART Configuration

Terminal or command line prompt

To configure the console UART, you need to access the bootloader or U-Boot environment. Within this environment, you can set the baud rate, data bits, stop bits, and parity for the UART. These configurations ensure that the communication between the embedded device and the computer is reliable and error-free.

Additionally, you may need to enable the console UART in the Linux kernel configuration. This involves selecting the appropriate UART driver for your hardware platform and specifying the console device as the UART port you configured earlier in the bootloader.

After configuring the console UART in the bootloader and kernel, you can establish a serial connection between the embedded device and the computer using a USB-to-serial adapter or other serial communication hardware. This connection allows you to access the Linux console on the embedded device and interact with the system for debugging, troubleshooting, and monitoring purposes.

Properly configuring the console UART is essential for developing and testing embedded Linux systems. It provides a vital link between the embedded device and external systems, enabling effective communication and control over the device’s operation.

Gatekeepers in Embedded Systems

One of the key gatekeepers in Embedded Linux Systems is the **kernel**. The kernel is the core component of the operating system that manages the system resources and provides the necessary interfaces for the applications to interact with the hardware. It enforces security policies, controls access to the system resources, and ensures the stability of the system.

Another important gatekeeper in Embedded Linux Systems is the **device driver**. Device drivers are software components that allow the operating system to communicate with the hardware devices. They play a critical role in ensuring that the hardware devices function properly and that the system can access and control them efficiently.

Gatekeepers in Embedded Systems are essential for ensuring the security, stability, and efficiency of **Linux on embedded systems**.

Signal Integrity Considerations

To maintain signal integrity, it is important to carefully design the layout of the system, paying attention to factors such as trace length, impedance matching, and noise control. Proper grounding and shielding techniques are also essential to minimize signal degradation.

Using high-quality components and following best practices in signal integrity design can help prevent signal distortion, reflection, and crosstalk. This is particularly important in systems where multiple components are interconnected, such as in the Internet of Things (IoT) devices.

By understanding the basics of signal integrity and implementing appropriate measures, developers can ensure that their embedded Linux systems operate efficiently and reliably. It is also advisable to stay updated on advancements in signal integrity technology to continuously improve system performance.

Embedded Linux System Workflow Steps

Step Description
1 Choose hardware platform
2 Select Linux distribution
3 Customize kernel configuration
4 Build root filesystem
5 Compile and install bootloader
6 Test system functionality
7 Deploy and monitor system

Top Essential Tools for Network Engineers

In the ever-evolving world of networking, having the right tools at your disposal can make all the difference. Today, we will explore the top essential tools that every network engineer should have in their arsenal.

Packet Analyzer Tools

Tool Name Description
Wireshark A free and open-source packet analyzer used for network troubleshooting, analysis, software and communications protocol development, and education.
Tshark A command-line network protocol analyzer that is part of the Wireshark suite of network analysis tools.
tcpdump A powerful command-line packet analyzer used to capture and display TCP/IP and other packets being transmitted or received over a network.
Ethereal A discontinued network protocol analyzer that has been replaced by Wireshark, but is still used in some older systems.

Network Mapping Tools

Nmap is a popular port scanner that provides detailed information about network hosts and services running on them. It is a versatile tool that can be used for network inventory, security auditing, and vulnerability assessment.

Another useful tool is Iperf, which measures network throughput and performance. It allows engineers to test the speed and quality of a network connection by generating traffic between two endpoints.

Network mapping tools play a crucial role in maintaining network security and optimizing performance. By utilizing these tools, engineers can ensure that the network is running efficiently and securely.

Penetration Testing Tools

***Nmap*** is a versatile tool that can be used for network discovery and security auditing, providing detailed information about network hosts and services. On the other hand, ***Snort*** helps in detecting and responding to potential threats, ensuring the security of the network.

Both these tools are compatible with Linux, making them ideal for network engineers who are looking to enhance their skills in cybersecurity. By mastering these tools, engineers can effectively secure their networks and prevent unauthorized access or data breaches.

Network Connection Testing Tools

Network connection testing tool interface

Another important tool for network engineers is **Snort**, an Intrusion Detection System that helps in monitoring and analyzing network traffic for potential security threats. By using tools like Snort, engineers can ensure the security and integrity of the network, protecting it from malicious attacks.

Network engineers can also benefit from using tools like **Port Scanner** to scan for open ports on servers, and **Wireless LAN** tools to manage wireless connections. These tools play a crucial role in maintaining the efficiency and reliability of the network infrastructure.

Performance Testing Tools

**Iperf** is a tool used for measuring bandwidth and testing the performance of network connections. It can help network engineers identify any bottlenecks or issues that may be affecting network speed. On the other hand, **Snort** is an intrusion detection system that can help detect and prevent any malicious activity on the network.

By using these performance testing tools, network engineers can ensure that their systems are running smoothly and securely. These tools are especially important in today’s interconnected world, where network security is a top priority. Incorporating these tools into your network management strategy can help you maintain a reliable and secure network for your organization.

Intrusion Prevention Tools

Implementing intrusion prevention tools on your network can help prevent attacks such as **backdoors** or **exploits**. By monitoring network traffic and analyzing packets, these tools can detect suspicious activity and take action to block it.

It is important for network engineers to have a good understanding of intrusion prevention tools and how to effectively use them to protect their network. By utilizing these tools, you can enhance the security of your network and prevent potential threats from compromising your data.

Wireless Network Tools

Another important tool for network engineers is Snort, a free and open-source software used for intrusion detection and prevention. This tool helps in monitoring network traffic for suspicious activities and potential threats.

Having access to tools like these is crucial for network engineers to ensure the security and efficiency of their wireless networks. By utilizing these tools, engineers can effectively manage and protect their networks from potential threats and vulnerabilities.

Network Monitoring Tools

**Snort** is a free and open-source network intrusion prevention system that monitors network traffic in real-time. It can detect and prevent various types of attacks, making it a valuable tool for enhancing network security.

**Wireshark** is another powerful tool that allows network engineers to capture and analyze network packets in real-time. With its user-friendly interface and robust features, Wireshark is a go-to tool for troubleshooting network issues and optimizing network performance.

Both **Snort** and **Wireshark** provide valuable insights into network traffic, helping engineers identify and address potential security threats and performance issues. Incorporating these tools into your network monitoring arsenal can greatly enhance your ability to maintain a secure and efficient network environment.

Latency Measurement Tools

Line graph showing latency measurements

Wireshark is a powerful network protocol analyzer that can capture and display the data traveling back and forth on a network. This tool can help engineers identify latency issues and troubleshoot network problems effectively.

Ping is a simple command-line tool that sends packets to a specific IP address and measures the time it takes for a response to be received. By using Ping, engineers can quickly determine the latency between two points on a network.

These latency measurement tools are invaluable for network engineers looking to optimize their network’s performance and ensure seamless communication across various devices and systems. By incorporating these tools into their toolkit, engineers can proactively monitor and address latency issues before they impact user experience.

Slack App Monitoring Tools

One essential tool for monitoring Slack apps is Snort, a powerful open-source software for computer security. Snort can detect and prevent suspicious network traffic, helping engineers to protect their network from potential threats.

Another important tool is Aircrack-ng, a freeware software framework for wireless LAN monitoring and password cracking. Network Engineers can use Aircrack-ng to test the strength of their network passwords and ensure secure access.

By incorporating these Slack App Monitoring Tools into their network management arsenal, engineers can enhance the performance and security of their network, ultimately ensuring mission critical operations run smoothly.

Data Matching Tools

One popular tool used by Network Engineers is **Snort**, a powerful software for computer security that can detect and prevent attacks on the network. Another important tool is **Linux**, a versatile operating system widely used in networking for its stability and security features.

By utilizing Data Matching Tools, Network Engineers can improve network performance, identify security vulnerabilities, and ensure data integrity. These tools play a crucial role in maintaining the smooth operation of computer networks and protecting sensitive information from unauthorized access.

Incorporating Data Matching Tools into network management practices can enhance the overall efficiency and reliability of the network infrastructure. Network Engineers should familiarize themselves with these tools to effectively monitor and manage network operations.

SolarWinds Engineer’s Toolset Overview

The SolarWinds Engineer’s Toolset is a comprehensive suite of network management tools designed to assist network engineers in maintaining the performance and security of their networks. This toolset includes over 60 tools, including network discovery, monitoring, and analysis tools, as well as tools for troubleshooting and configuring network devices.

One of the key features of the SolarWinds Engineer’s Toolset is its ability to provide real-time monitoring and alerting for network devices and services. This allows network engineers to quickly identify and address any issues that may arise, helping to ensure the smooth operation of the network.

In addition to monitoring and alerting capabilities, the Engineer’s Toolset also includes tools for network device configuration management, bandwidth monitoring, and network traffic analysis. These tools can help network engineers optimize network performance and troubleshoot any issues that may impact network throughput.

Create a File in Linux Terminal

In the world of Linux, mastering the terminal is essential for efficient file management. One basic skill every Linux user should have is creating a file directly from the command line. Let’s dive into the simple steps to create a file in the Linux terminal.

Create a File with Touch Command

To create a file in the Linux terminal using the touch command, simply type “touch” followed by the desired filename. This command will create a new empty file with the specified name. If you want to create a file with a specific extension, you can include it in the filename. For example, “touch example.txt” will create a text file named “example”.

You can also create multiple files at once by separating the filenames with a space. To check if the file has been successfully created, you can use the “ls” command to list all files in the directory.

Create a New File With the Redirect Operator

To create a new file using the redirect operator in Linux terminal, you can use the following command: **touch filename.txt**. This will create a blank text file with the specified name. If you want to add content to the file at the same time, you can use the **printf** command followed by the redirect operator: **printf “Hello, World!” > filename.txt**.

Alternatively, you can also use a text editor like **Vim** or **GNU nano** to create and edit the file directly in the terminal. Simply type the command **nano filename.txt** to open the file in nano and start typing. Once you’re done, use **Ctrl + X** to save and exit the editor.

Create File with cat Command

Command Description
cat > file.txt Creates a new file named file.txt using the cat command

Create File with echo Command

Terminal window with echo command

To create a file in Linux terminal using the echo command, simply type “echo ‘your text here’ > filename.txt” and press enter. This will create a new file named filename.txt with the text you specified.

If you want to append text to an existing file, use “echo ‘new text’ >> filename.txt”.

To view the contents of the file you created, you can use the cat command like this: “cat filename.txt”.

Create File with printf Command

To create a file in the Linux terminal using the printf command, first open your terminal. Then, use the following command:

“`bash
printf “Your content here” > filename.txt
“`

Replace “Your content here” with the text you want in the file, and “filename.txt” with the desired name of your file. Press Enter to create the file with the specified content.

You can also use printf to format text using placeholders like %s for strings and %d for integers. This allows for more complex file creation with specific formatting.

Once you have created the file, you can use text editors like Vim or GNU nano to further edit the content. Remember to save your changes before exiting the editor.

By mastering commands like printf, you can efficiently create files in the Linux terminal for various purposes.

Linux Command Line Calculator Guide

Discover the power of the Linux command line calculator with this comprehensive guide.

Overview of Linux Command Line Calculators

Linux command line calculators provide a convenient and efficient way to perform various mathematical calculations directly from the command line interface. These calculators allow users to execute complex arithmetic operations, such as addition, subtraction, multiplication, and division, with ease. They also support advanced functions like square root, floor and ceiling functions, and more.

Whether you need to work with integers, decimals, or even complex numbers, Linux command line calculators offer the flexibility to handle a wide range of calculations. Some calculators, like AWK and Sed, provide additional features for more specialized tasks.

By mastering the syntax and operation of these tools, users can streamline their mathematical workflows and enhance their overall efficiency when working in a Linux environment. Whether you are a beginner or an experienced programmer, incorporating Linux command line calculators into your toolbox can greatly improve your productivity.

Advanced Arithmetic Operations in Linux

When using the Linux command line calculator, you can perform advanced arithmetic operations with ease. This includes **multiplication**, **division**, **addition**, and **subtraction** among others. The calculator supports various functions such as **square roots** and **ceilings**.

You can also work with integers, decimals, and even complex numbers. The calculator allows for precise calculations, making it a valuable tool for programmers and mathematicians alike. It supports multiple programming languages like **Python**, **C**, **Perl**, and **PHP**.

By mastering the Linux command line calculator, you can streamline your mathematical operations and improve your efficiency. Whether you need to perform elementary arithmetic or complex calculations, the calculator has you covered. Take your arithmetic skills to the next level with this powerful tool in Linux.

Working with Floating-Point Numbers

When working with ***floating-point numbers*** in the Linux command line calculator, it is important to understand how to accurately perform arithmetic operations.

Using the appropriate ***syntax*** and understanding the behavior of the calculator will ensure accurate results.

Remember to pay attention to ***significant figures*** and decimal precision when working with numbers.

Utilize functions such as square root, floor, and ceiling functions to perform more complex calculations.

If working with complex numbers, be sure to use the correct syntax and operations.

By familiarizing yourself with these concepts and utilizing the command-line calculator effectively, you can perform a wide range of mathematical calculations with ease on the Linux operating system.

Defining Functions and Variables

In the Linux command line calculator, you can define functions and variables to perform complex mathematical calculations. Functions can be created using the syntax `function_name() { //code }`, while variables can be assigned using `variable_name=value`. These functions and variables can then be used in calculations by calling the function or referencing the variable.

When defining functions, make sure to include all necessary parameters and utilize proper syntax. Variables can store numbers or strings to be used in calculations. Understanding the behavior of functions and variables is crucial for accurate calculations in the command line calculator.

By defining functions and variables in the Linux command line calculator, you can perform a wide range of operations including elementary arithmetic, floating-point arithmetic, and more. Take advantage of this feature to streamline your mathematical tasks and enhance your Linux training.

Using ‘awk’ Command for Calculations

The ‘awk’ command in Linux can be a powerful tool for performing calculations directly from the command line. To use ‘awk’ for calculations, you can simply enter the desired mathematical expression along with the ‘awk’ command. For example, you can add two numbers together by entering ‘awk {print 2+2}’.

‘awk’ supports basic arithmetic operations such as addition, subtraction, multiplication, and division. It also allows you to perform more complex calculations by using mathematical functions like sqrt() or sin(). You can also work with floating-point numbers and specify the precision of your output.

By mastering the ‘awk’ command for calculations, you can streamline your workflow and perform mathematical operations quickly and efficiently directly from the command line. This can be incredibly useful for Linux users who frequently work with numbers and need a quick and convenient way to perform calculations.

Troubleshooting Syntax Errors

When using the Linux command line calculator, syntax errors can sometimes occur. These errors typically arise from incorrect formatting or misplaced characters in your input. To troubleshoot syntax errors, double-check your command for any missing parentheses, commas, or operators. Make sure that you are using the correct syntax for functions and mathematical operations.

If you encounter a syntax error, carefully review the command you entered and look for any typos or formatting mistakes. Pay close attention to the order of operations and ensure that your input follows the proper mathematical syntax.

Keep in mind that Linux command line calculator supports a wide range of mathematical functions and operations, so familiarize yourself with the syntax for each one. By mastering the correct formatting and syntax, you can avoid common errors and perform accurate calculations seamlessly.

Mastering Linux Command Line Calculator Techniques

Linux command prompt screen.

Command Description
bc A powerful command line calculator that supports advanced mathematical functions
expr A simple command line calculator for performing basic arithmetic operations
awk A versatile command line tool that can be used as a calculator by writing custom scripts
dc A reverse-polish notation calculator that can perform complex mathematical operations

Linux tar command tutorial

Welcome to our Linux tar command tutorial, where we will explore the ins and outs of this powerful tool for archiving and compressing files in the world of Linux operating systems.

Creating Tar Archive Files

To create a tar archive file in Linux, you can use the tar command followed by specific options and arguments.

One common syntax is: tar -cvf archive_name.tar file_or_directory. This command will create a new tar archive file with the specified name.

You can also add more files or directories to an existing archive by using the -r option: tar -rvf archive_name.tar file_or_directory.

To view the contents of a tar archive file, you can use the -tf option: tar -tvf archive_name.tar.

Syntax and Options of the tar Command

Option Description
-c Create a new archive
-x Extract files from an archive
-f Specify the archive file name
-v Verbose mode, show the progress of the operation
-z Compress the archive with gzip
-j Compress the archive with bzip2
-t List the contents of an archive
-r Append files to an archive

Compressing Tar Archives

Tar archive being compressed

To compress a tar archive, you can use the tar command with the -z flag for gzip compression. This will reduce the size of the archive and make it easier to store or transfer. For example, to compress a directory named “example” into a tar archive with gzip compression, you can use the following command: tar -czvf example.tar.gz example.

Another option is to use the -j flag for bzip2 compression, which provides even better compression but may take longer to compress and decompress. To compress a tar archive using bzip2 compression, you can use the following command: tar -cjvf example.tar.bz2 example.

Once you have compressed the tar archive, you can easily decompress it using the -x flag. For gzip compressed archives, you can use: tar -xzvf example.tar.gz. For bzip2 compressed archives, you can use: tar -xjvf example.tar.bz2.

Compressing tar archives is a simple and effective way to save space and make it easier to manage your files on a Linux system. By using the appropriate flags with the tar command, you can quickly compress and decompress your files without losing any important data.

Extracting Files from Tar Archives

To extract files from a tar archive, you can use the command: tar -xvf filename.tar. This command will extract all files from the tar archive into the current working directory. If you want to extract files to a specific directory, you can use: tar -xvf filename.tar -C /path/to/directory. This will extract the files from the tar archive into the specified directory.

To view the contents of a tar archive without extracting them, you can use: tar -tvf filename.tar. This will display a list of all files and directories within the tar archive. If you only want to extract specific files from a tar archive, you can specify the filenames after the -xvf flag.

For example, to extract only a file named “example.txt” from a tar archive, you can use: tar -xvf filename.tar example.txt. This will extract only the specified file from the tar archive.

Extracting Specific Files from Archives

To extract specific files from archives using the Linux tar command, you can specify the files you want to extract by listing their names after the tar command. For example, to extract a file named “example.txt” from an archive named “archive.tar”, you would use the command tar -xvf archive.tar example.txt.

If you want to extract files from a specific directory within the archive, you can use the -C option followed by the directory path. For instance, to extract files from a directory named “folder” within the archive, you would use the command tar -xvf archive.tar -C folder.

You can also use wildcard characters to extract files that match a specific pattern. For example, to extract all text files from an archive, you could use the command tar -xvf archive.tar *.txt.

By mastering the tar command and its various options, you can efficiently extract specific files from archives in Linux, saving time and storage space.

Adding and Deleting Files in Tar Archives

To add files to a tar archive, you can use the tar -r command followed by the name of the archive and the files you want to add. For example, to add a file named “example.txt” to an archive named “archive.tar”, you would use tar -r -f archive.tar example.txt.

To delete files from a tar archive, you can use the tar –delete command followed by the name of the file you want to remove from the archive. For example, to delete a file named “example.txt” from the archive “archive.tar”, you would use tar –delete -f archive.tar example.txt.

Remember to always specify the name of the archive you are working with when adding or deleting files. This ensures that you are making changes to the correct archive and not accidentally modifying a different file.

Adding and deleting files in tar archives can help you manage your data more efficiently and keep your archives organized. These commands are essential for working with tar archives on Linux systems.

Extracting Multiple Files from Archives

To extract multiple files from archives using the Linux tar command, you can specify the files you want to extract by adding their names after the command. This can be done by using the -x flag followed by the names of the files you want to extract.

Another way to extract multiple files is to use wildcards in the file names. For example, if you want to extract all files with a .txt extension, you can use the command tar -xvf archive.tar *.txt.

You can also extract files to a specific directory by using the -C flag followed by the path to the directory where you want the files to be extracted. This can be done by using the command tar -xvf archive.tar -C /path/to/directory.

Using Wildcards in Linux for File Extraction

When working with the Linux tar command, wildcards can be incredibly useful for file extraction.

To use wildcards, you can specify a pattern that matches multiple files at once, saving time and effort.

For example, if you want to extract all text files in a directory, you can use the command `tar -xvf *.txt`.

This will extract all files with a .txt extension in the current working directory.

Using wildcards in Linux can streamline the file extraction process and make it more efficient.

Remember to be cautious when using wildcards, as they can match unintended files if not used carefully.

By mastering the use of wildcards in Linux, you can become more proficient in managing and manipulating files within the operating system.

Appending Files to Existing Archives

To append files to an existing archive using the Linux tar command, you can simply use the -r flag followed by the name of the archive and the files you want to add. This will add the specified files to the end of the archive without altering any existing contents.

For example, to add a file named “example.txt” to an archive called “archive.tar”, you would use the command: tar -rvf archive.tar example.txt.

This can be useful when you want to add new files to an archive without having to recreate it from scratch. It’s a quick and efficient way to update existing archives with additional files.

Appending files to existing archives is a common task in data storage and management, especially when dealing with large amounts of information. By using the tar command in Linux, you can easily concatenate new files to your archives with just a few simple commands.

Verifying and Checking Tar Archive Files

To verify and check a tar archive file in Linux, you can use the tar command with the -t option. This option allows you to list the contents of the archive without extracting them.

For example, to check the contents of a tar archive named archive.tar, you can run the command tar -tvf archive.tar. This will display a list of all the files and directories contained in the archive.

If you want to verify the integrity of the tar archive, you can use the –check option. This option will check the archive for any errors or corruption.

To verify the archive named archive.tar, you can run the command tar –check -f archive.tar. If there are no errors, the command will not display any output.

By verifying and checking tar archive files, you can ensure that your data is safe and intact, making it easier to manage and transfer files effectively.

Excluding and Removing Files in Tar Archives

To exclude files when creating a tar archive, use the –exclude option followed by the file or directory you want to exclude. For example, to exclude a file named “example.txt”, use the command tar –exclude=example.txt -cvf archive.tar /directory.

To remove files from an existing tar archive, use the –delete option followed by the file you want to remove. For example, to remove a file named “example.txt” from the archive.tar file, use the command tar –delete -f archive.tar example.txt.

Excluding and removing files in tar archives can be useful when you want to exclude certain files from the archive or remove unnecessary files from an existing archive. This can help reduce the size of the archive and make it more manageable.

By using the –exclude and –delete options in the tar command, you can easily exclude or remove files as needed, making it a versatile tool for managing tar archives.

Extracting File Extensions from Tar Archives

When working with **tar archives** in **Linux**, you may need to extract specific files based on their **extensions**. To do this, you can use the **tar command** with the **–extract** or **-x** option followed by the **–wildcards** or **-W** flag.

For example, if you want to extract only **.txt** files from a tar archive named **archive.tar**, you can use the following command:
“`bash
tar -xvf archive.tar –wildcards ‘*.txt’
“`

This command will extract all files with the **.txt** extension from the **archive.tar** file. You can replace **.txt** with any other file extension you want to extract.

By using this method, you can quickly and easily extract specific files based on their extensions from tar archives in Linux. This can be helpful when dealing with large tar archives containing multiple file types.

Tar Command Usage and Options in Linux

The **tar** command in Linux is used for archiving files and directories. It combines multiple files into a single file for easier storage or transfer. This command is essential for managing large amounts of data efficiently.

When using the **tar** command, there are various options that can be specified to customize the behavior of the archive. For example, you can specify the compression level, file permissions, and include/exclude specific files or directories.

Some commonly used options include **-c** for creating a new archive, **-x** for extracting files from an archive, and **-z** for compressing the archive using gzip. These options can be combined to suit your specific needs.

By mastering the **tar** command and its options, you can efficiently manage and transfer files in Linux, making it an essential tool for any system administrator or Linux user.

Linux i Command Tutorial

Welcome to the ultimate guide to mastering the i command in Linux.

Redirecting Data

To redirect data in Linux, you can use the i command. This command allows you to redirect the output of a command to a specific file or device. For example, you can use the command “ls > file.txt” to redirect the output of the ls command to a file named file.txt.

This can be useful for saving the output of a command for later use or analysis. You can also use the cat command to concatenate multiple files and redirect the output to a new file. For example, you can use the command “cat file1.txt file2.txt > combined.txt” to concatenate file1.txt and file2.txt and save the output to a new file named combined.txt.

Redirecting data in Linux is a powerful feature that can help you manage and manipulate data efficiently.

Levels of Expertise

Level Description
Beginner Basic understanding of Linux commands, able to navigate the file system and perform simple operations.
Intermediate Familiar with more advanced commands, able to manipulate files and directories effectively.
Advanced Extensive knowledge of Linux commands, proficient in scripting and automation tasks.

Learning Resources and Support

For additional learning resources and support in mastering the Linux i command, consider reaching out to online forums and communities dedicated to Linux enthusiasts. These platforms offer valuable insights, troubleshooting tips, and guidance from experienced users. Additionally, exploring online tutorials and courses can provide structured learning opportunities to enhance your skills.

Emergency Jump Starter for Cars – Best Deals and Reviews

In need of a reliable emergency jump starter for your car? Look no further! This article provides the best deals and reviews to help you make the right choice.

Jump Starter Buying Guide and Tips

Car battery with jumper cables

When looking for an emergency jump starter for your car, consider factors such as power output, safety features, and portability. Look for models with a high peak current to ensure they can start your vehicle easily. Safety features like reverse polarity protection and spark-proof technology are essential to prevent accidents. Portability is key if you need to use the jump starter on the go. Read reviews from trusted sources and compare prices to find the best deal. Make sure to follow the manufacturer’s instructions for proper use and maintenance to extend the life of your jump starter.

How to Jump Start a Car Safely

Jump start cables and a car battery.

To jump start a car safely, first make sure both vehicles are turned off. Connect the red jumper cable to the positive terminal of the dead battery and the other end to the positive terminal of the working battery. Next, connect the black jumper cable to the negative terminal of the working battery and the other end to a metal surface on the dead car, away from the battery. Start the working car and let it run for a few minutes, then try starting the dead car.

If it doesn’t start, you may need to call a professional for help.

Benefits of Having a Portable Jump Starter

A portable jump starter

– A portable jump starter provides peace of mind in case of a dead battery emergency, allowing you to jump-start your car without the need for another vehicle or assistance.
– It is compact and lightweight, making it easy to store in your glove compartment or trunk for quick access during emergencies.
– Portable jump starters are versatile and can be used for various vehicles, including cars, motorcycles, and boats, making them a practical investment for all drivers.
– They are user-friendly and typically come with built-in safety features to prevent damage to your vehicle or injury during use.