Unveiling the Gateway to Endless Possibilities: A Guide to Installing Node.js on Linux
Node.js Installation on Alpine Linux
To install Node.js on Alpine Linux, follow these steps:
1. Open the terminal on your Alpine Linux machine.
2. Run the following command to update the package manager:
sudo apk update
3. Install the necessary dependencies by running the following command:
sudo apk add libuv libuv-dev libuv-static
4. Next, install the libicu package by running the following command:
sudo apk add icu-libs icu-libs-static
5. Now, you can install Node.js by running the following command:
sudo apk add nodejs npm
6. To verify the installation, check the Node.js version with the following command:
node –version
That’s it! You now have Node.js installed on your Alpine Linux machine. Enjoy developing server-side JavaScript applications and exploring the vast ecosystem of npm packages.
Node.js Installation on Android
To install Node.js on Linux, follow these steps:
1. Open the terminal on your Linux machine.
2. Update your package manager by running the command: sudo apt update.
3. Install the Node.js package by running: sudo apt install nodejs.
4. Verify the installation by checking the Node.js version with: node -v.
5. To install the npm package manager, run: sudo apt install npm.
6. Confirm the npm installation by checking its version with: npm -v.
That’s it! You’ve successfully installed Node.js on your Linux machine. Now you can start developing web applications and server-side JavaScript using Node.js.
Node.js Installation on Arch Linux
To install Node.js on Arch Linux, follow these steps:
1. Open the terminal and update the package manager with the command: “sudo pacman -Syu”.
2. Install Node.js using the package manager with the command: “sudo pacman -S nodejs”.
3. Verify the installation by checking the Node.js version with the command: “node -v”.
4. Optionally, you can install npm (Node Package Manager) by running the command: “sudo pacman -S npm”.
5. To install specific Node.js versions, you can use Nodenv, a tool that manages multiple Node.js versions. Install Nodenv with the command: “git clone https://github.com/nodenv/nodenv.git ~/.nodenv”.
6. Set up Nodenv by appending the following lines to your ~/.bashrc or ~/.zshrc file:
export PATH=”$HOME/.nodenv/bin:$PATH”
eval “$(nodenv init -)”
7. Restart the terminal or run “source ~/.bashrc” (or ~/.zshrc) to apply the changes.
Now you have successfully installed Node.js on Arch Linux. Enjoy using Node.js for your web development projects!
Node.js Installation on CentOS, Fedora, and Red Hat Enterprise Linux
To install Node.js on CentOS, Fedora, or Red Hat Enterprise Linux, you can follow these steps:
1. Open your terminal and log in as the root user or use sudo for administrative privileges.
2. Update your package manager by running the appropriate command for your distribution, such as “yum update” for CentOS or “dnf update” for Fedora.
3. Add the Node.js repository to your system by downloading and installing the repository configuration file. You can find the instructions on the official NodeSource website.
4. Install Node.js using your package manager. For CentOS and Red Hat Enterprise Linux, use “yum install nodejs”. For Fedora, use “dnf install nodejs”.
5. Verify the installation by checking the Node.js version with the “node -v” command.
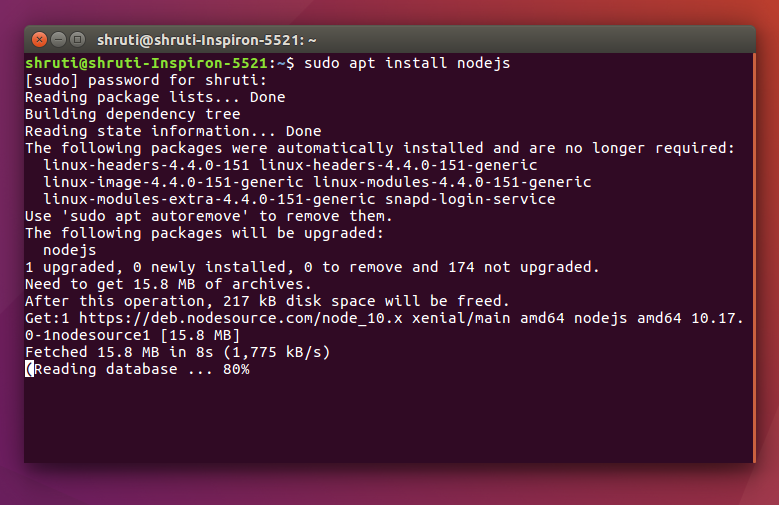
Node.js Installation on Debian and Ubuntu based Linux distributions
Node.js can be easily installed on Debian and Ubuntu based Linux distributions. To install Node.js on these distributions, follow these steps:
1. Open the terminal on your Linux system.
2. Update the package lists with the command sudo apt-get update.
3. Install the necessary packages for Node.js with the command sudo apt-get install nodejs.
4. Verify the installation by checking the Node.js version with the command node -v.
5. Additionally, you may want to install npm (Node Package Manager) with the command sudo apt-get install npm.
Node.js Installation on FreeBSD
To install Node.js on FreeBSD, follow these steps:
1. Open the terminal and log in to your FreeBSD system.
2. Update the package repository by running the command: sudo pkg update.
3. Install the Node.js package by running: sudo pkg install node.
4. Verify the installation by checking the Node.js version: node -v.
5. You can also install npm, the package manager for Node.js, by running: sudo pkg install npm.
6. Test the npm installation by checking the npm version: npm -v.
These steps should help you install Node.js on FreeBSD and get you started with Linux training.
Node.js Installation on Gentoo
To install Node.js on Gentoo, follow these steps:
1. Open the terminal and log in as the root user or use the sudo command.
2. Update the package manager by running the following command: emerge –sync
3. Install Node.js by running the command: emerge -av nodejs
4. After the installation is complete, verify the installation by running node -v to check the Node.js version.
5. You can also install npm by running emerge -av npm to manage your Node.js packages.
6. Congratulations! You have successfully installed Node.js on Gentoo. Now you can start developing web applications and take advantage of its powerful features.
Node.js Installation on IBM i
To install Node.js on Linux, follow these steps:
1. Open the terminal and type the command sudo apt-get install nodejs.
2. Press Enter to begin the installation process.
3. Enter your password when prompted.
4. After the installation is complete, verify the installation by typing node -v in the terminal. This will display the version of Node.js installed.
5. You can also install npm (Node Package Manager) by typing sudo apt-get install npm in the terminal.
6. To check the version of npm, type npm -v in the terminal.
7. Congratulations! You have successfully installed Node.js on Linux.
Remember to regularly update Node.js and npm to ensure compatibility with the latest packages and modules.
Node.js Installation on macOS
To install Node.js on macOS, follow these steps:
1. Open Terminal on your macOS device.
2. Use Homebrew package manager to install Node.js by running the command: brew install node.
3. Wait for the installation to complete. You may be prompted to enter your password.
4. Once the installation is finished, verify that Node.js is installed by running the command: node -v. This will display the installed version of Node.js.
5. Additionally, you can check if npm (Node Package Manager) is installed by running the command: npm -v.
6. Congratulations! You have successfully installed Node.js on your macOS.
Node.js Installation on NetBSD
To install Node.js on Linux, follow these steps:
1. Open a terminal window.
2. Update the package manager by running the command: sudo apt-get update.
3. Install Node.js by running the command: sudo apt-get install nodejs.
4. Verify the installation by checking the Node.js version with the command: node -v.
5. Install npm (Node Package Manager) by running the command: sudo apt-get install npm.
6. Verify the npm installation by checking the version with the command: npm -v.
These steps will ensure that you have Node.js and npm installed on your Linux system, allowing you to start developing and running Node.js applications.
Node.js Installation on OpenBSD
To install Node.js on OpenBSD, follow these steps:
1. Open the terminal and log in as the root user.
2. Update the package repository using the command: pkg_add -u.
3. Install Node.js by running: pkg_add node.
4. Verify the installation by typing: node -v in the terminal. You should see the installed Node.js version.
5. To install npm, the Node.js package manager, run: pkg_add npm.
6. Confirm the installation by typing: npm -v.
7. Now you can start using Node.js on OpenBSD for your development projects or running server-side applications.
Node.js Installation on openSUSE and SLE
To install Node.js on openSUSE and SLE, follow these steps:
1. Open the terminal and update your package manager by running the command: sudo zypper update.
2. Install the Node.js package by running the command: sudo zypper install nodejs.
3. Verify the installation by checking the Node.js version: node -v.
4. You can also install npm, the Node.js package manager, by running: sudo zypper install npm.
5. To install specific Node.js modules or packages, use the npm command line tool.
Remember to consult the official documentation or community forums for any issues you may encounter during the installation process.
Installing Node.js on openSUSE and SLE is a straightforward process that will enable you to develop and run Node.js applications on these Linux distributions.
Node.js Installation on SmartOS and illumos
To install Node.js on SmartOS and illumos, follow these steps:
1. Connect to your SmartOS or illumos server using SSH or any other remote access method.
2. Open the terminal and execute the following command to download the Node.js installation script:
curl -sL https://deb.nodesource.com/setup_14.x | sudo -E bash –
3. After the script finishes downloading, execute the following command to install Node.js:
sudo apt-get install -y nodejs
4. Verify that Node.js is installed correctly by running the command:
node -v
5. You should see the installed Node.js version displayed in the terminal.
Node.js Installation on Snap
To install Node.js on Linux using the Snap package, follow these steps:
1. Open the terminal by pressing Alt + T or searching for “Terminal” in your applications menu.
2. Run the following command to install Node.js: sudo snap install node –classic
3. Enter your password when prompted.
4. The installation may take a few minutes. Once it’s complete, you can verify the installation by typing node -v in the terminal. You should see the installed version of Node.js.
Installing Node.js via Snap is an easy and convenient way to get the latest version of Node.js on your Linux system. It eliminates the need to manually download and configure the environment. Plus, with the Snap package, you can ensure that Node.js is kept up to date automatically.
Note: Snap is available on various Linux distributions, including Ubuntu, Kali Linux, and Rocky Linux. If you’re using a different distribution, consult its documentation for the specific installation command, such as yum install or sudo apt get.
Node.js Installation on Solus
To install Node.js on Solus, there are a few steps you need to follow. First, open the terminal by pressing Alt + T. Next, use the sudo apt get update command to update your package manager. Then, install the libicu package by running sudo apt get install libicu-dev.
After that, you can use the NodeSource script to install Node.js. Simply go to the NodeSource website and find the command for Solus. Copy and paste it into the terminal and press Enter.
Once the installation is complete, you can check the version of Node.js installed by typing node -v.
That’s it! You have successfully installed Node.js on Solus. Now you can start using it to develop applications and take advantage of its powerful features and vast library of npm packages.
Node.js Installation on Void Linux
To install Node.js on Void Linux, follow these steps:
1. Open the terminal and update the package manager with the command: sudo xbps-install -Syu.
2. Next, install the Node.js package by running: sudo xbps-install -S nodejs.
3. Verify the installation by checking the Node.js version with: node -v.
4. You can also install npm, the package manager for Node.js, by executing: sudo xbps-install -S npm.
5. To test if npm is working correctly, run: npm -v.
That’s it! Node.js is now installed on your Void Linux system. Enjoy developing applications using this powerful JavaScript runtime environment.
Note: If you encounter any issues during the installation process, consider reaching out to the package maintainer or the Node.js community for assistance.
Node.js Installation on Windows
Installing Node.js on Linux is a straightforward process. To get started, you need to open your terminal and update the package manager using the command “sudo apt update”. Once the update is complete, you can install Node.js by running “sudo apt install nodejs”.
After the installation is finished, you can check the installed version of Node.js by typing “node -v” in the terminal. Additionally, you can install the npm package manager by running “sudo apt install npm”.
Keep in mind that different Linux distributions may have different ways to install Node.js. For example, on CentOS, you can use the command “sudo yum install nodejs” instead.
Installing Node.js on Linux is an essential step for those interested in Linux training. It allows you to utilize the powerful capabilities of Node.js, such as building web applications, handling server-side operations, and connecting to databases. So, take the first step and install Node.js on your Linux system to start your journey into the world of web development.
Checking and Updating npm Version
To check the version of npm installed on your Linux system, you can use the npm command line. Open your terminal and type “npm -v” to display the version number.
If you need to update npm to the latest version, you can do so by running the command “npm install -g npm”. This will update npm to the newest available version.
It’s important to keep npm up to date as it ensures compatibility with the latest packages and features. Additionally, updating npm can resolve any potential issues or bugs that may arise.
By regularly checking and updating your npm version, you can ensure that your Node.js projects run smoothly and efficiently.
