Unlocking the full potential of your Chromebook has never been easier – by installing Linux, you can revolutionize your device’s capabilities and explore a whole new world of possibilities. In this article, we will guide you through the straightforward process of installing Linux on your Chromebook, opening doors to enhanced functionality, increased customization, and endless opportunities for tech enthusiasts.
Getting Started
To get started with installing Linux on your Chromebook, you’ll need to follow a few simple steps. First, make sure your Chromebook is compatible with Linux by checking the official list of supported devices. Once you’ve confirmed compatibility, enable developer mode on your Chromebook by following the instructions provided by Google.
Next, you’ll need to choose a Linux distribution to install. Ubuntu and GNOME are popular choices, but you can also explore other options like Xfce or LXDE depending on your preferences. Download the ISO file for your chosen distribution from their official website.
Now, you’ll need to create a bootable USB flash drive with the Linux distribution. Use a tool like Etcher or Rufus to burn the ISO file onto the USB drive. Make sure to back up any important data on the USB drive, as the process will erase all existing content.
Once you have your bootable USB drive ready, restart your Chromebook and enter the developer mode. From there, you can access the command-line interface and use the “sudo” command to gain superuser privileges. Follow the installation prompts and select the appropriate options for your setup.
After the installation is complete, you can choose to dual-boot between ChromeOS and Linux or make Linux your primary operating system. You can also install additional software packages using the package manager of your chosen Linux distribution.
Remember to secure your Linux installation by setting a strong password and regularly updating your system. You can also explore additional customization options like installing different desktop environments or tweaking system settings to suit your needs.
With Linux installed on your Chromebook, you’ll have access to a wide range of applications and tools, from productivity software like GIMP and Firefox to gaming platforms like Steam. Enjoy the flexibility and power that Linux brings to your Chromebook!
Enabling Developer Mode
1. Turn off your Chromebook.
2. Press and hold the Esc key, Refresh key (F3), and the Power button simultaneously.
3. A warning screen will appear. Press Ctrl + D to enable Developer Mode.
4. Another warning screen will appear, informing you that enabling Developer Mode will erase all local data. Press Enter to continue.
5. Your Chromebook will reboot and enter Developer Mode. This process may take a few minutes.
Once Developer Mode is enabled, you can proceed with installing Linux on your Chromebook. Remember that this process may void your warranty, so proceed with caution.
It’s important to note that different Chromebook models have different ways of enabling Developer Mode. Make sure to check your specific model’s instructions before proceeding.
With Developer Mode enabled, you can now explore the world of Linux on your Chromebook and take your coding skills to the next level. Good luck on your Linux journey!
Installing Linux Apps with Crostini
To get started, make sure you have the latest version of ChromeOS installed on your Chromebook. Then, go to the settings menu and enable the Linux (Beta) feature. This will install a lightweight Linux distribution, specifically Ubuntu, with the GNOME desktop environment.
Once the Linux feature is enabled, you can open the Linux terminal by clicking on the app launcher and selecting the Terminal app. From here, you can use all the familiar Linux commands and utilities.
To install Linux apps, you can use the package manager called apt-get. This allows you to easily install software from the Ubuntu repositories. For example, if you want to install the popular image editing software GIMP, you can simply run the command “sudo apt-get install gimp” in the terminal.
You can also install Linux apps directly from the Ubuntu Software Center, which provides a graphical interface for browsing and installing applications.
Once installed, Linux apps will appear in your Chromebook’s app launcher, just like any other application. You can launch them with a single click and they will run in their own window, separate from your ChromeOS applications.
Installing Ubuntu with Crouton
![]()
To get started, you’ll need to enable developer mode on your Chromebook. This will allow you to install and run Linux distributions. Once developer mode is enabled, you can install Crouton from the command line using the shell.
Once Crouton is installed, you can choose which version of Ubuntu you want to install. Options include Unity, Xfce, and LXDE. Each has its own advantages and features, so choose the one that suits your needs best.
After selecting your desktop environment, Crouton will download and install the necessary files. This may take some time, so be patient. Once the installation is complete, you can switch between Chrome OS and Ubuntu with a simple keyboard shortcut.
In Ubuntu, you’ll have access to a wide range of software and tools. You can use the command-line interface to install additional programs or use the software center to browse and install applications.
Dual-Boot Chrome OS with Gallium
To install Linux on your Chromebook, you can dual-boot Chrome OS with Gallium. This allows you to have both operating systems on your device, giving you the flexibility to switch between them as needed.
First, you’ll need to enable developer mode on your Chromebook. This will give you superuser access and allow you to modify the system. Keep in mind that this process will erase all data on your device, so be sure to back up any important files.
Once you’re in developer mode, you’ll need to download and install Gallium. Gallium is a Linux distribution specifically designed for Chromebooks with ARM architecture. It offers a user-friendly interface, similar to Unity, and supports a wide range of applications.
To install Gallium, you’ll need a USB flash drive with at least 4GB of storage. Download the Gallium image and use a tool like Etcher to create a bootable USB drive. Then, insert the USB drive into your Chromebook and reboot.
During the boot process, press Ctrl+L to enter the SeaBIOS firmware. From here, you can select the USB drive as the boot device. Gallium will then start up, and you can follow the on-screen instructions to install it on your Chromebook.
Once the installation is complete, you’ll have the option to choose between Chrome OS and Gallium every time you boot up your device. This way, you can enjoy the best of both worlds – the simplicity and security of Chrome OS, and the versatility of Linux.
Remember to set a password for your Gallium installation to keep it secure. Also, familiarize yourself with the file manager and shell commands, such as Bash, to navigate and customize your Linux system.
With Linux on your Chromebook, you can explore a wide range of applications, including Steam for gaming and Firefox for browsing. You can also encrypt your files for added security and take advantage of the powerful software available in the Linux ecosystem.
So, if you’re looking to expand your knowledge and dive into the world of Linux, dual-booting Chrome OS with Gallium is a great way to get started. Enjoy the freedom and flexibility of having two operating systems in one device!
Switching Between Operating Systems
First, it’s important to understand the basics of Linux and how it differs from other operating systems. Linux is an open-source operating system that offers a wide range of use cases, from desktop computing to cloud computing. It is known for its stability, security, and flexibility.
Before diving into the installation process, it’s crucial to back up any important data as the process may involve wiping the Chromebook’s storage. Once that’s done, the next step is to enable Developer Mode on the Chromebook. This can be done by pressing a specific key combination during startup.
Once Developer Mode is enabled, the next step is to install a Linux distribution on the Chromebook. There are several options available, such as Ubuntu, Debian, and Fedora. These distributions can be installed using tools like Crouton or by creating a bootable USB drive.
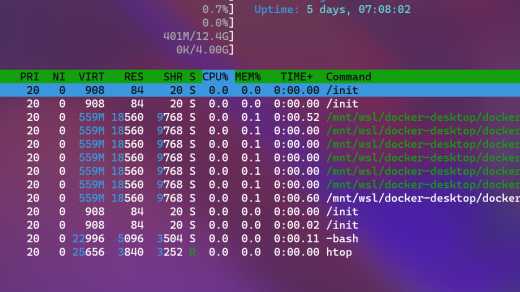
After the Linux distribution is installed, it’s time to familiarize yourself with the Linux environment. Linux uses a shell, such as Bash, for executing commands. Understanding basic commands and navigating the directory structure is essential for using Linux effectively.
Once you’re comfortable with the Linux environment, you can start exploring the various applications and tools available. Linux offers a wide range of software, including office suites, web browsers, media players, and programming tools. You can also install popular applications like Steam for gaming.
It’s important to note that switching between operating systems may require some adjustments. For example, file managers and applications may have different interfaces and functionalities. However, with time and knowledge, you’ll be able to navigate and utilize Linux efficiently.
Conclusion and Further Readings
Conclusion:
In conclusion, installing Linux on your Chromebook opens up a world of possibilities and expands the range of use for your device. With Linux, you can customize your user interface, access a wider range of software and applications, and even delve into coding and programming.
Further Readings:
If you’re interested in exploring Linux further, there are several resources available to help you get started. Websites like Reddit and forums dedicated to Linux enthusiasts can provide valuable insights and support. Additionally, books such as “Linux for Beginners” or “The Linux Command Line” can provide in-depth knowledge and guidance.